The POEGuy Sucky Boy Compendium
Siege Ballista Hierophant · Sucky Boy · Gear progression
Progression timeline representation made by BigCookies and build by POEGuy
💡 General Note: This is a companion site for getting a general idea of how to progress the build at each stage. So read POEGuy's full guide, watch the videos for deeper explanations, and ask for help on the Discord Server when needed.
Gear progression varies with lucky drops and market prices.
⚠ Warning: 3.29 changes—especially the removal of Synthesis items and the Hierophant nerf—have made it difficult for POEGuy to recommend Siege Ballista to new players. This guide now lives under the Community tabs with information for players still interested in Siege and dex stacking. This community variant will be slightly different from POEGuy's version.
Phase 1: EA-Phase Level 30-78
📋 POEGuy EA-Ballista POB: pobb.in/5jc4IEW9e_iu Check the guide for the most up to date.
🎯 Goal: Level through Acts into maps until 78, or until Siege gear is ready to swap. Gear targets match Early Maps EA once you hit maps.
🟠 Mandatory Uniques
Weapon Pieces
- •
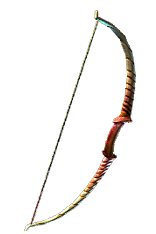 Quill Rain
- Take the Bow Mastery that converts Projectile Speed into Damage; aim for high Projectile Speed.
- Avoid Foulborn versions that replace Projectile Speed with Increased Area of Effect; it is a damage nerf.
- •
 Skirmish (+1 Totem).
Armour Pieces
- •
 Wilma's Requital — grants Ancestral Bond and raises totem hit chance (saves tree points).
 - •
 Daresso's Defiance (Onslaught source).
✨ Nice to Have Uniques
Accessories
- •
 Immortal Flesh (early mapping sustain).
🍪 Cookie Notes:
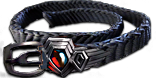 Prismweave (cheap damage belt)
Prismweave (cheap damage belt)- Swap to another belt once you take the Elemental Equilibrium Keystone — Prismweave adds extra elemental damage on hit and will brick the keystone, preventing the wanted -25% Fire Resistance exposure.
🧪 Flask Setup
- •
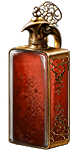 Life Flask: Divine Life Flask with Immunity to Corrupted Blood and Bleeding.
 - •
 Utility 1: Start with the Granite Flask and then aim for the Rumi's Concoction flask. Provides massive physical damage reduction and block chance.
 - •
 Utility 2: Jade Flask for evasion.
 - •
 Utility 3: Quicksilver Flask for movement speed.
 - •
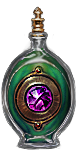 Utility 4: Amethyst Flask for Chaos Resistance.
Rolling & Setup
- •Prefixes: % Duration, % Charge Recovery, or % Max Charges.
- •Suffixes: % Armour, % Crit Chance, % Evasion, or % Movement Speed.
- •Warning: Flask suffixes do not stack! If you activate multiple flasks with the same suffix, only the highest value applies. Ensure each magic flask has a unique suffix.
- •Flask Automation: Enchant utility flasks with Used When Charges Reach Full if you have not already.
- •Prep: 20% quality with Glassblower's Baubles.
⚪ Baseline Gear
- •Acts 1–3 Weapons: Dual-wield Sceptres or Wands (no shield). Prefer % Spell Damage, % Fire Damage, +Level of Fire Skill Gems, or flat fire to spells.
- •
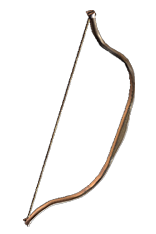 Act 3+ Bow: High % Increased Attack Speed and high base Attacks Per Second Bow until Quill Rain. (Tooltip lies — it does not calculate EA fuse damage!)🍪 Cookie Notes: The only 4 mods that affect direct-hit EA on a rare bow are:
- #% Attack Speed
- #% increased Elemental Damage with Attack Skills
- #% increased Fire Damage (bench craft only)
- #% increased Projectile Speed (with bow mastery)
🟡 Nice to Have Rares
Weapon Pieces
- •
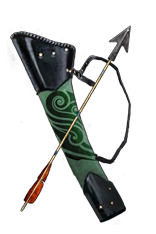 Rare Quiver — only before Skirmish (WARNING: NO PIERCE)
- Best bases:
- Broadhead Arrow Quiver
- Primal Arrow Quiver
- Two-Point Arrow Quiver
- Feathered Arrow Quiver
- Best bases:
Accessories
- •
 Amulet
- Look for +1 to Level of all Fire Skill Gems
- Anoint Divine Judgement:
 Sepia,
  Teal,
Teal,  Black
Black
- •
 Rings — Life, resists; grab % Fire Damage or #% increased Elemental Damage with Attack Skills if you see it.🍪 Cookie Notes:Buying a cheap Life + resists ring on trade is enough for this softcore trade setup—essence crafting is optional.
- If you want to learn the essence crafting system, you can spam
 Deafening/Shrieking Essence of Anger for guaranteed % Fire Damage. (Essences above Screaming will reroll rare items without needing to scour them first).
- If you want to learn the essence crafting system, you can spam
- •
 Belt — Life, resists; grab #% increased Elemental Damage with Attack Skills if you see it.
Cluster Jewels
- •
 Rare: 4-passive totem cluster jewel with Sleepless Sentries.
- Note: Requires Item Level 68+ to roll Sleepless Sentries.
- Warning: Do not allocate all nodes on the cluster! Only path through Sleepless Sentries to the jewel socket. The wasted point from when you allocate the entire cluster could go to main-tree for Dexterity, crit, or life instead.
Armour Pieces
- •
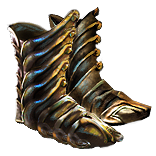 Rare Boots (Preferably Armour / Evasion base) (Look for +25% Movement Speed).
-
Eater of Worlds Ichor any of the following:
- Regenerate #% of Life per second per Endurance Charge- #% increased Armour from Equipped Helmet and Gloves- #% increased Life Regeneration rate
-
Searing Exarch Ember any of the following:
- #% increased Damage per Endurance Charge- #% increased Action Speed- #% increased Movement Speed
-
Eater of Worlds Ichor any of the following:
- •
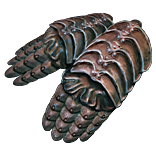 Rare Gloves (Preferably Armour / Evasion base)
-
Eater of Worlds Ichor any of the following:
- Inflict Fire Exposure on Hit, applying #% to Fire Resistance- +#% chance to Suppress Spell Damage- #% increased Evasion Rating from Equipped Helmet and Boots
-
Searing Exarch Ember any of the following:
- #% increased Attack Speed- #% chance to Intimidate Enemies for 4 seconds on Hit- Ignites you inflict spread to other Enemies within # metres- #% increased Damage per Frenzy Charge
-
Eater of Worlds Ichor any of the following:
- •
 Rare Helmet (Preferably Armour / Evasion base)
-
Eater of Worlds Ichor any of the following:
- #% of Physical Damage from Hits taken as X elemental Damage- #% increased Attack Damage- Damage Penetrates #% Fire Resistance
-
Searing Exarch Ember any of the following:
- #% reduced Mana Cost of Attacks (Only if struggling with mana)- #% of X Damage taken Recouped as Life- +#% to maximum Lightning Resistance- #% increased Area of Effect
-
Eater of Worlds Ichor any of the following:
- •
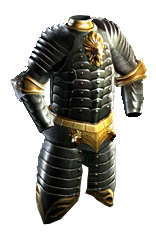 Body Armour (Preferably Armour / Evasion base)
-
Eater of Worlds Ichor any of the following:
- #% of Physical Damage from Hits taken as an elemental type- #% Chance to Block Attack Damage- #% Chance to Block Spell Damage- #% increased Armour- +#% to all Elemental Resistances
-
Searing Exarch Ember any of the following:
- +#% to all maximum Resistances- +#% maximum to an elemental resistance type- #% of Damage taken Recouped as Life- #% increased effect of Non-Curse Auras from your Skills
-
Eater of Worlds Ichor any of the following:
📈 Stats to look for on rare items
General Baseline (All Rares)
80+ Maximum Life
60%+ Elemental Resistances
Ring & Belt Bonus (Nice to Have):
- % Increased Damage with Elemental Attacks (Rings & Belts)
- % Increased Fire Damage (Rings only)
Quiver Priorities
Baseline: 80+ Life & 60%+ Elemental Resistances
Bonus Stats:
- #% increased Attack Speed
- #% increased Damage with Bow Skills
💡 Phase Notes & Crafting
- •Trade Priority: Buy Quill Rain then Skirmish as soon as currency allows; pick up Wilma's Requital and Daresso's Defiance for early maps.
- •Flask Reminder: Remember to Check your flask setup after finishing acts and map progression. They are a huge defensive power boost.
- •Utility Gems: Keep Ensnaring Arrow and Frenzy at level 1.
- Frenzy: Effect does not scale with level—only quality. Also keeps mana cost low to make it easier to trigger with Manaforged Arrows.
- Ensnaring Arrow: At level 1, easier mana cost threshold so you can trigger it reliably with Manaforged Arrows.
- •Green Socket: Put Explosive Arrow on Body Armour with at least 1 Green Socket. Matching green grants +10% Quality — that is +1 maximum fuse.
- •EA Warning: Avoid Penetrating Arrow Quivers entirely; Pierce, Chaining, or Splitting prevents Explosive Arrow fuses from sticking.
- •🍪 Cookie Notes: Ring essence crafting is optional—buy Life + resists on trade if you prefer. Use Deafening or Shrieking Essence of Anger only if you want to practice the essence system for % fire damage.
- •Catalysts: Apply
 Turbulent Catalysts to rings/belts with % Fire Damage or Elemental Damage until 20% catalyst quality.
 - •Eldritch Crafting: Eldritch Ichor and Eldritch Ember can be used on rare non-corrupted Armour pieces to add extra powerful implicit mods.
- •Acquisition: Rare equipment can also be acquired from trade or the Breach Genesis tree using Provisioning Wombgifts.
Phase 2: Early-Siege Days 1-3 | 50c Invested
⚠ Do Not Rush the Transition! Explosive Arrow and Quill Rain can carry you deep into Red Maps.
🎯 Requirements: Level 78 minimum; mid-80s is safer if gear is weak. Ensure your Siege Ballista gem is at least level 15 and has 20% quality before swapping. 1400 Dexterity (allows you to do early red maps comfortably).
📋 Compendium POB: pobb.in/XtKdFNbQEZRY
📋 Love86 Siege POB: pobb.in/GxNcOB_xjHuZ
🏆 Goal: 1600 Dexterity
🟠 Mandatory Uniques
Budget Note: Do not overspend; this Siege setup should usually stay around 15-20 Divines before you consider moving currency into Shrapnel Ballista.
Weapon Pieces
- •
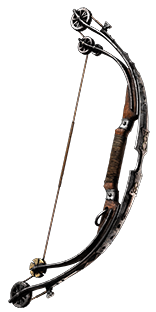 Weapon: Iron Commander (19-20% Attack Speed; Blessed Orb the implicit Crit Chance).
 - •
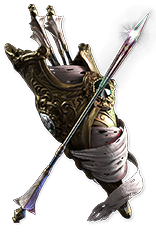 Quiver: The Poised Prism (Blessed Orb the implicit; aim for good Resistance rolls).
Accessories
- •
 Amulet: Hyrri's Truth
- DO NOT enable Level 30 Precision; aim for ~80 Dexterity and ~50% Crit Multi.
 Priority Upgrade: Astramentis
Upgrade when you have the currency.Anoint Shaman's Dominion: Clear,
  Azure,
  Silver
Armour Pieces
- •
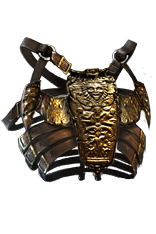 Body Armour: Briskwrap (5-link required for the transition).
 - •
 Helmet: Fractal Thoughts (CRITICAL: keep Strength higher than Intelligence; aim for 35-40% Crit Multi).
 - •
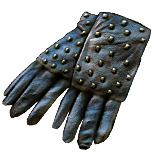 Gloves: Hrimsorrow
🧪 Flask Setup
- •Life Flask: Divine Life Flask with Immunity to Corrupted Blood and Bleeding.
- •Utility 1: Start with the Granite Flask and then aim for the Rumi's Concoction flask. Provides massive physical damage reduction and block chance.
- •Utility 2: Jade Flask for evasion.
- •Utility 3: Quicksilver Flask for movement speed.
- •Utility 4: Amethyst Flask for Chaos Resistance.
Rolling & Setup
- •Prefixes: % Duration, % Charge Recovery, or % Max Charges.
- •Suffixes: % Armour, % Crit Chance, % Evasion, or % Movement Speed.
- •Warning: Flask suffixes do not stack! If you activate multiple flasks with the same suffix, only the highest value applies. Ensure each magic flask has a unique suffix.
- •Flask Automation: Enchant utility flasks with Used When Charges Reach Full if you have not already.
- •Prep: 20% quality with Glassblower's Baubles.
💎 Jewels
🚫 OMIT: Watcher's Eye, Split Personality & Garukhan's Flight.
They are expensive early on; add them in Mid-Siege instead!
They are expensive early on; add them in Mid-Siege instead!
Base Jewels
- •
 Unique: 3x Fluid Motion (buy 22-24 Dexterity rolls).
 - •
 Unique: 1x Brutal Restraint (must beat Fluid Motion; target at least 1x 5% Dexterity + 1x 20 flat Dexterity).
 - •
 Rare: 20+ Dexterity abyss jewel.Socket: Place it in your Stygian Vise.
 - •
 Rare: 1x Rare Jewel with % Maximum Life and flat Dexterity.
Cluster Jewels
- •Rare: 4-passive totem cluster jewel with Sleepless Sentries.
- Note: Requires Item Level 68+ to roll Sleepless Sentries.
- Warning: Do not allocate all nodes on the cluster! Only path through Sleepless Sentries to the jewel socket. The wasted point from when you allocate the entire cluster could go to main-tree for Dexterity, crit, or life instead.
- 🍪 Cookie Notes: If it also rolls Ancestral Reach, only allocate Sleepless Sentries until you can still hit 2000 Dexterity with the extra point; this build is very skill-point starved.
🍪 Cookie Notes: Suggested jewels
Outside of the primary POB, you can add these extra jewels for Dexterity.
- •1x Fluid Motion (buy a 22-24 Dexterity roll). Place it in the socket normally used by the Brutal Restraint Timeless Jewel.Strength Warning: This setup reduces your Strength. Temporarily use a lower-level Steelskin until you can afford Astramentis.When to Replace: Swap it for a Brutal Restraint that beats Fluid Motion in this slot—at least 1x 5% increased Dexterity.
- •
 1x Careful Planning (buy a 22-24 Dexterity roll). Place it in the jewel socket next to the Elemental Equilibrium Keystone.
🟡 Rare Gear
🔨 Crafting: Use a  Shrieking Essence of Sorrow if currency is tight, or a
  Deafening Essence of Sorrow (preferred).
Shrieking Essence of Sorrow if currency is tight, or a Deafening Essence of Sorrow (preferred).
💡 Catalysts: Apply  Intrinsic Catalysts to rings/belts until 20% catalyst quality.
Intrinsic Catalysts to rings/belts until 20% catalyst quality.
Accessories
- •Rare Rings (Option: Fractured rings with +# to all Attributes)
- •
 Stygian Vise Belt
Armour Pieces
- •Rare Boots (Look for +25% Movement Speed).
📈 Stats to look for on rare items
General Baseline (All Rares)
80+ Maximum Life
60%+ Elemental Resistances
43+ Dexterity
💡 Phase Notes & Crafting
- •Flask Reminder: Remember to Check your flask setup after finishing acts and map progression. They are a huge defensive power boost.
- •Swap Safety: If Dexterity, resistances, flasks, or the Fractal Thoughts stat rule are not solved, stay EA-Phase a little longer.
- •Utility Gems: Keep Frost Bomb, Ensnaring Arrow, and Frenzy at level 1.
- Frost Bomb: Can add a high Intelligence requirement and can cause you to die in elemental reflect maps if leveled too high.
- Frenzy: Effect does not scale with level—only quality. Also keeps mana cost low to make it easier to trigger with Manaforged Arrows.
- Ensnaring Arrow: At level 1, easier mana cost threshold so you can trigger it reliably with Manaforged Arrows.
- •Catalysts: Apply Intrinsic Catalysts to rings/belts until 20% catalyst quality.
- •Crafting: You can use Shrieking Essence of Sorrow and move up to Deafening Essence of Sorrow for early siege where currency is tight, to guarantee high Dexterity.
- •Omit: Watcher's Eye, Split Personality & Garukhan's Flight. They are expensive early on; add them in Mid-Siege instead.
Phase 3: Mid-Siege Days 4-7 | 2 Div Invested
🎯 Requirements: Ensure you have at least a 5-link bow and quality on all skill gems.
📋 Compendium POB: pobb.in/XtKdFNbQEZRY
📋 Love86 Siege POB: pobb.in/GxNcOB_xjHuZ
🏆 Goal: 1800 Dexterity (At 1800 you will be effortlessly blasting red maps).
🔮 Skill Gem Upgrades
- •Enhance Support (Level 4): Link it with Siege Ballista inside a Briskwrap with +1 Socketed Gems. This pushes Siege Ballista to the Level 22 totem breakpoint and scales Enhance for huge Attack Speed.
- Enhance must be Level 4 to beat a Level 20, 20% quality Faster Attacks Support. Do not use a lower-level Enhance—Level 1 does nothing, and Level 3 is still not quite enough to beat Faster Attacks.
🟠 Mandatory Uniques
Budget Note: Corruptions are nice-to-have marginal upgrades. Do not overspend; this Siege setup should usually stay around 15-20 Divines before you consider moving currency into Shrapnel Ballista.
Weapon Pieces
- •Weapon: Iron Commander
- •Quiver: The Poised Prism
Accessories
- •Amulet: Astramentis
- Anoint Shaman's Dominion: Clear, Azure, Silver
- Anoint Shaman's Dominion:
Armour Pieces
- •Body Armour: Briskwrap (Corruptions: +2 Projectile Gems or +1 Socketed Gems for Level 22 Siege Ballista and +1 totem).
- •Helmet: Fractal Thoughts (Keep Strength higher than Intelligence for the 15% Dexterity bonus; Corruptions: +2 Aura Gems, +2 AoE Gems, or % Maximum Life).
- •Gloves: Hrimsorrow
- •
 Boots: Garukhan's Flight (Corruption: % Increased Movement Speed).
🧪 Flask Setup
- •Life Flask: Divine Life Flask with Immunity to Corrupted Blood and Bleeding.
- •Utility 1: Start with the Granite Flask and then aim for the Rumi's Concoction flask. Provides massive physical damage reduction and block chance.
- •Utility 2: Jade Flask for evasion.
- •Utility 3: Quicksilver Flask for movement speed.
- •Utility 4: Amethyst Flask for Chaos Resistance.
Rolling & Setup
- •Prefixes: % Duration, % Charge Recovery, or % Max Charges.
- •Suffixes: % Armour, % Crit Chance, % Evasion, or % Movement Speed.
- •Warning: Flask suffixes do not stack! If you activate multiple flasks with the same suffix, only the highest value applies. Ensure each magic flask has a unique suffix.
- •Flask Automation: Enchant utility flasks with Used When Charges Reach Full if you have not already.
- •Prep: 20% quality with Glassblower's Baubles.
💎 Jewels
Base Jewels
- •Unique: 3x Fluid Motion (buy 22-24 Dexterity rolls).
- •
 Unique: +2 Attributes Light of Meaning (use while pushing toward 2000 Dexterity).
 - •Unique: 1x Brutal Restraint (target 2x 5% Dexterity + 1x 20 flat Dexterity).
- •
 Unique: 1x Split Personality (+5 Dexterity / +40 Armour; Life or Strength second stat is fine).
 - •
 Unique: 1x Watcher's Eye (Chance to Evade while affected by Grace).
Cluster Jewels
- •Rare: 4-passive totem cluster jewel with Sleepless Sentries.
- Note: Requires Item Level 68+ to roll Sleepless Sentries.
- Warning: Do not allocate all nodes on the cluster! Only path through Sleepless Sentries to the jewel socket. The wasted point from when you allocate the entire cluster could go to main-tree for Dexterity, crit, or life instead.
- 🍪 Cookie Notes: If it also rolls Ancestral Reach, only allocate Sleepless Sentries until you can still hit 2000 Dexterity with the extra point; this build is very skill-point starved.
🟡 Rare Gear
🔨 Crafting: Use a Deafening Essence of Sorrow.
Deafening Essence of Sorrow.
💡 Catalysts: Apply Intrinsic Catalysts to rings/belts until 20% catalyst quality.
Intrinsic Catalysts to rings/belts until 20% catalyst quality.
Accessories
- •Elder or Hunter Stygian Vise. Can roll % increased Attributes.
- Note: Tier 1: 10–12% · Tier 2: 6–9%.
- •Rings (Choose One Path):
- Choice A: Regular Rare Rings
-
Choice B: 2x Redeemer influence rings paired with
 Bound By Destiny with the following mod: (10–15)% increased Dexterity if 2 Redeemer Items are Equipped.
Warning: This path replaces your Watcher's Eye jewel socket.
Bound By Destiny with the following mod: (10–15)% increased Dexterity if 2 Redeemer Items are Equipped.
Warning: This path replaces your Watcher's Eye jewel socket. - Choice C: Fractured rings with +# to all Attributes.
📈 Stats to look for on rare items
General Baseline (All Rares)
80+ Maximum Life
60%+ Elemental Resistances
51+ Dexterity
💡 Phase Notes & Crafting
- •Utility Gems: Keep Frost Bomb, Ensnaring Arrow, and Frenzy at level 1.
- Frost Bomb: Can add a high Intelligence requirement and can cause you to die in elemental reflect maps if leveled too high.
- Frenzy: Effect does not scale with level—only quality. Also keeps mana cost low to make it easier to trigger with Manaforged Arrows.
- Ensnaring Arrow: At level 1, easier mana cost threshold so you can trigger it reliably with Manaforged Arrows.
- •Catalysts: Apply Intrinsic Catalysts to rings/belts until 20% catalyst quality.
- •Crafting: You can use Deafening Essence of Sorrow to guarantee high Dexterity.
- •Bound by Destiny: If you use the Redeemer ring setup, this jewel will replace your Watcher's Eye slot.
- •Illegal Combinations: Be aware of illegal item combinations. Some influence combos are forbidden by GGG in the coding:
- Influenced items cannot be fractured.
- Influenced items cannot be split.
- But Split items can become Influenced items.
Phase 4: Late-Siege Days 7+ | 10d+ Invested
🎯 Requirements: Complete Mid-Siege gear foundation.
📋 Compendium POB: pobb.in/XtKdFNbQEZRY
📋 Love86 Siege POB: pobb.in/GxNcOB_xjHuZ
🏆 Goal: 2000 Dexterity (Do not push past 2000 Dexterity; if you want to invest further, transition into Shrapnel Ballista instead).
🔮 Skill Gem Upgrades
- •Enhance Support (Level 4): Link it with Siege Ballista inside your rare body armour with +1 to Socketed Dexterity Gems. Both gems are green, so the armour scales Siege Ballista and pushes Enhance toward nearly 250% increased Attack Speed.
- Enhance must be Level 4 to beat a Level 20, 20% quality Faster Attacks Support. Do not use a lower-level Enhance—Level 1 does nothing, and Level 3 is still not quite enough to beat Faster Attacks.
🟠 Mandatory Uniques
Budget Note: Corruptions are nice-to-have marginal upgrades. Do not overspend; this Siege setup should usually stay around 15-20 Divines before you consider moving currency into Shrapnel Ballista.
Weapon Pieces
- •Weapon: Iron Commander
- •Quiver: The Poised Prism (Corruptions: Adds flat Cold Damage or Bow Attacks fire an Additional Arrow).
Accessories
- •Amulet: Astramentis
- Intrinsic Catalyst. Anoint Shaman's Dominion: Clear, Azure, Silver
Armour Pieces
- •Helmet: Fractal Thoughts (Keep Strength higher than Intelligence for the 15% Dexterity bonus; Corruptions: +2 Aura Gems, +2 AoE Gems, or % Maximum Life).Change: Prefer a corruption of Socketed Gems get a 90% Cost & Reservation Multiplier.
- •Gloves: Hrimsorrow (Corruptions: Crit Chance for Attacks, Attack Speed, or Maximum Life).
- •Boots: Garukhan's Flight (Corruption: % Increased Movement Speed).
🧪 Flask Setup
- •Life Flask: Divine Life Flask with Immunity to Corrupted Blood and Bleeding.
- •Utility 1: Start with the Granite Flask and then aim for the Rumi's Concoction flask. Provides massive physical damage reduction and block chance.
- •Utility 2: Jade Flask for evasion.
- •Utility 3: Quicksilver Flask for movement speed.
- •Utility 4: Amethyst Flask for Chaos Resistance. Swap to a Diamond Flask or Sulphur Flask once your Chaos Resistance is capped via The Light of Meaning jewel.
Rolling & Setup
- •Prefixes: % Duration, % Charge Recovery, or % Max Charges.
- •Suffixes: % Armour, % Crit Chance, % Evasion, or % Movement Speed.
- •Warning: Flask suffixes do not stack! If you activate multiple flasks with the same suffix, only the highest value applies. Ensure each magic flask has a unique suffix.
- •Flask Automation: Enchant utility flasks with Used When Charges Reach Full if you have not already.
- •Prep: 20% quality with Glassblower's Baubles.
💎 Jewels
Base Jewels
- •Unique: 3x Fluid Motion (buy 24 Dexterity rolls).
- •Unique: 1x Brutal Restraint (target 2x 5% Dexterity + 1x 20 flat Dexterity).
- •Unique: 1x Split Personality (+5 Dexterity / +40 Armour; socket far from start).Change: Use 2× Split Personality:
- +5 Dexterity / +5 Strength
- +5 Dexterity / +5 Intelligence
- •Unique: 1x Watcher's Eye (Chance to Evade while affected by Grace).
- •Unique: % Chaos Resistance Light of Meaning (swap in once 2000 Dexterity is solved).
Cluster Jewels
- •Rare: 4-passive totem cluster jewel with Sleepless Sentries.
- Note: Requires Item Level 68+ to roll Sleepless Sentries.
- Warning: Do not allocate all nodes on the cluster! Only path through Sleepless Sentries to the jewel socket. The wasted point from when you allocate the entire cluster could go to main-tree for Dexterity, crit, or life instead.
- 🍪 Cookie Notes: If it also rolls Ancestral Reach, only allocate Sleepless Sentries until you can still hit 2000 Dexterity with the extra point; this build is very skill-point starved.
Change: Also use 1x Large Cluster Jewel (12 Passives).- Bases:
- 10% increased Attack Damage
- 12% increased Cold Damage
- 12% increased Damage with Bows
- 12% increased Damage with Two Handed Weapons
- Priority mods: 25% or 35% Increased Effect, +6–8 Dexterity.
- Nice to haves: All Attributes, Maximum Life, or Resistances.
- Craft: See Cluster Jewel Crafting for the fractured / clean-base walkthrough.
🏹 Also on Shrapnel Ballista: If you move past 2000 Dexterity on Siege, several items carry straight over—especially % Chaos Resistance Light of Meaning, Watcher's Eye (Grace evade), and Astramentis. See Shrapnel Ballista and Timeless Jewel Guide for the full Shrapnel timeline.
🟡 Rare Gear
🔨 Crafting: Use a Deafening Essence of Sorrow.
Deafening Essence of Sorrow.
💡 Catalysts: Apply Intrinsic Catalysts to rings/belts until 20% catalyst quality.
Intrinsic Catalysts to rings/belts until 20% catalyst quality.
Accessories
- •Elder or Hunter Stygian Vise. Can roll % increased Attributes.
- Note: Tier 1: 10–12% · Tier 2: 6–9%.
- •Rings (Choose One Path):
- Choice A: Regular Rare Rings
-
Choice B: 2x Redeemer influence rings paired with Bound By Destiny with the following mod: (10–15)% increased Dexterity if 2 Redeemer Items are Equipped.
Warning: This path replaces your Watcher's Eye jewel socket.Change: On the version, Bound by Destiny can also replace the +5 Dexterity / +5 Intelligence Split Personality jewel slot in the Large Cluster.
- Choice C: Fractured rings with +# to all Attributes.
-
Choice D:
 Redeemer Helical Ring with T1 Dexterity and high Elemental Resistance. Copy it with
  Kalandra's Touch in ring slot 2.
Armour Pieces
- •Special Rare Body Armour: Redeemer + Hunter body armour. Redeemer supplies elevated % Dexterity and +1 to Socketed Dexterity Gems; Hunter supplies Attack Crit and Additional Curse.
Crafting method: Refer to the Notion Crafting Guide.
📈 Stats to look for on rare items
General Baseline (All Rares)
80+ Maximum Life
60%+ Elemental Resistances
51+ Dexterity
💡 Phase Notes & Crafting
- •Utility Gems: Keep Frost Bomb, Ensnaring Arrow, and Frenzy at level 1.
- Frost Bomb: Can add a high Intelligence requirement and can cause you to die in elemental reflect maps if leveled too high.
- Frenzy: Effect does not scale with level—only quality. Also keeps mana cost low to make it easier to trigger with Manaforged Arrows.
- Ensnaring Arrow: At level 1, easier mana cost threshold so you can trigger it reliably with Manaforged Arrows.
- •Catalysts: Apply Intrinsic Catalysts to rings/belts until 20% catalyst quality.
- •Armour Crafting: Use a Redeemer + Hunter body armour; see the Notion Crafting Guide.
- •Crafting: You can use Deafening Essence of Sorrow to guarantee high Dexterity.
- •Bound by Destiny: If you use the Redeemer ring setup, this jewel will replace your Watcher's Eye slot.
- •Illegal Combinations: Be aware of illegal item combinations. Some influence combos are forbidden by GGG in the coding:
- Influenced items cannot be fractured.
- Influenced items cannot be split.
- But Split items can become Influenced items.
TL;DR Crafting and Notes Quick Reference
Armour, Flasks & Swap Checklist Implicits · Ready checks
🛡 Armour & Flasks
- •Eldritch Implicits (EA-Phase): Use Searing Exarch Embers and Eater of Worlds Ichors on your non-corrupted Rare Helmet, Gloves, Boots, and Body Armour to add powerful implicit mods.
- •Endgame body armour: Redeemer + Hunter Conquest Lamellar. Redeemer gives elevated % Dexterity and +1 to Socketed Dexterity Gems; Hunter gives Attack Crit and Additional Curse. Follow the Notion Crafting Guide for the full sequence.
- •Harvest bow enchant: Horticrafting on the bow—1% increased Attack Speed per 8% Quality (DPS).
- •Flask rolling & automation: Optimize magic utility flasks for permanent defensive uptime.
- Roll: Use
 Orbs of Alteration until you hit your target mod pairs.
 - Prefixes: % Duration, % Charge Recovery, or % Max Charges.
- Suffixes: % Armour, % Crit Chance, % Evasion, or % Movement Speed—one unique type per flask.
- Quality: 20% quality with Glassblower's Baubles.
- Flask Automation: Enchant utility flasks with Used When Charges Reach Full if you have not already.
- Warning: Flask suffixes do not stack—only the highest value applies if duplicated. Full walkthrough in Mid/Late Flask Setup.
- Roll: Use
- •Item Acquisition: Rare equipment can also be acquired from trade or the Breach Genesis tree using Provisioning Wombgifts.
✅ Swap Checklist
- •Minimum: Level 78, first 3 Labs, Siege Ballista at level 15 with 20% quality, and 1400+ Dexterity.
- •Fractal Thoughts: Strength must be higher than Intelligence.
- •EA Projectile Reminder: no Pierce, Chaining, or Splitting during EA-Phase; fuses must stick. Keep 0 Pierce later for Ensnaring Arrow.
- •Utility Gems: Keep Frost Bomb, Ensnaring Arrow, and Frenzy at level 1.
- Frost Bomb: Can add a high Intelligence requirement and can cause you to die in elemental reflect maps if leveled too high.
- Frenzy: Effect does not scale with level—only quality. Also keeps mana cost low to make it easier to trigger with Manaforged Arrows.
- Ensnaring Arrow: At level 1, easier mana cost threshold so you can trigger it reliably with Manaforged Arrows.
- •Delay: Bad Siege gear at 78 feels worse than staying EA-Phase a few more levels.
Setup & Quality Catalysts · Harvest · Final slams
💍 Pre-craft setup
- •Catalysts: Apply Intrinsic Catalysts to rings/belts until 20% catalyst quality.
🌿 Bench & finishers
- •Harvest Fix: Use the Horticrafting bench to swap resistance types when the tier is good but the element is wrong.
- •Final Slam: If your finished rare has an open affix, use an
 Exalted Orb for a free extra stat.
📌 Crafting reminders
- •Illegal Combinations: Be aware of illegal item combinations. Some influence combos are forbidden by GGG in the coding:
- Influenced items cannot be fractured.
- Influenced items cannot be split.
- But Split items can become Influenced items.
Jewelry Crafting EA fire · Siege dexterity · Rare bases
🛠 Step-by-Step Crafting Walkthroughs
🔥 EA-Phase Ring
- Base: Acquire any Ring base to cover the resistances you need.
- Roll: Use Deafening/Shrieking Essence of Anger to upgrade it (or reroll it), guaranteeing % Fire Damage. (Essences above Screaming will reroll rare items without needing to scour them first).
- Target: Repeat until the item rolls a high Maximum Life modifier (+70 or higher) and at least one good Elemental Resistance.
- Finish (Crafting Bench): Craft whichever stat is missing.
- Ring/Belt Life: +(41-55) to Maximum Life.
- Ring/Belt Resistances: +(29-35)% to a single Elemental Resistance, or +(17-20)% to a dual Elemental Resistance.
- Ring Utility: Non-Channelling Skills have -6 to -7 to Total Mana Cost.
- Open affix: Use an Exalted Orb for one extra stat.
- Final Step: Once satisfied with the ring, apply Turbulent Catalysts until 20% catalyst quality for stronger elemental damage modifiers.
🏹 Siege Phase Ring/Belt
- Base: Acquire one of the following bases:
- Rare Ring or Belt Base.
- Fractured Base (with +# to all Attributes).
- Redeemer Influenced Base (if using Bound by Destiny).
- Roll: Use Deafening/Shrieking Essence of Sorrow to upgrade/reroll it, guaranteeing Tier 1 flat Dexterity. (Essences above Screaming will reroll rare items without needing to scour them first).
- Target: Repeat until the item rolls a high Maximum Life modifier (+70 or higher) and required Resistances.
- Finish (Crafting Bench): Craft whichever stat is missing.
- Ring/Belt Life: +(41-55) to Maximum Life.
- Ring/Belt Resistances: +(29-35)% to a single Elemental Resistance, or +(17-20)% to a dual Elemental Resistance.
- Ring Utility: Non-Channelling Skills have -6 to -7 to Total Mana Cost.
- Open affix: Use an Exalted Orb for one extra stat.
- Final Step: Once satisfied with the ring or belt, apply Intrinsic Catalysts until 20% catalyst quality to increase Attribute modifiers.
Cluster Jewel Crafting Medium totem · Large Dex stacking
Medium Cluster — Totem Damage
- Base: Medium Cluster Jewel with Totem Damage enchant—Item Level 68+ (required to roll Sleepless Sentries), 4 passives (5 is fine on 2-notable clusters; ilvl 68-74 keeps the pool cleaner).
- Method: Spam Orbs of Alteration and
 Orbs of Augmentation until you hit Sleepless Sentries.
 - Target: Use a
 Regal Orb. Try to hit Ancestral Reach.
- Warning: Do not allocate all nodes on the cluster! Only path through Sleepless Sentries to the jewel socket. The wasted point from when you allocate the entire cluster could go to main-tree for Dexterity, crit, or life instead.
- 🍪 Cookie Notes: If you hit both notables, only take Sleepless Sentries until you can still reach 2000 Dexterity; this build is very skill-point starved.
- Trade: Searching by notable names is usually fastest.
 Large Cluster Jewel (Dexterity Stacking)
Change: 1x Large Cluster Jewel (12 Passives) for raw Dexterity and small-passive damage. Prefer bases that scale attacks/bows; Increased Effect multiplies flat Dex on the small nodes. See Late Siege Jewels for targets.
Base Required: ilvl 84+, 12 passives, one of:
- 10% increased Attack Damage
- 12% increased Cold Damage
- 12% increased Damage with Bows
- 12% increased Damage with Two Handed Weapons
Tier note: These are target modifier value brackets for buying, rolling, or fracturing the jewel. Tier 1 is best; Tier 2 is the budget fallback (25% Increased Effect is fine early—upgrade later).
Trade check: Always price-check finished or near-finished listed jewels before crafting; buying can be cheaper than forcing bases, fractures, and failed attempts.
Using a Pre-Fractured Cluster Jewel Base
- Tier 1 targets to use: 35% Increased Effect, +8 Dexterity, or +4 All Attributes.
- Tier 2 targets to use: 25% Increased Effect, +6–7 Dexterity, or +3 All Attributes.
- Buy at least 3 bases with one target pre-fractured, or self-fracture if
 Fracturing Orbs are cheap.
- Base Note: Keep backups ready. If one craft becomes a dud, move to the next base.
- Spam Orbs of Alteration for the missing partner:
- % Effect if +Dexterity is fractured.
- +Dexterity if % Effect is fractured.
- Profit Note: If you hit 25–35% Effect with another useful attribute like T1/T2 Intelligence or Life, price-check it. Sell if valuable; otherwise keep rolling.
- Use an Orb of Augmentation, then a Regal Orb.
- Fill open affixes with Exalted Orbs. Bad hit?
 Scour and restart.
Clean Base
- Tier 1 targets: 35% Increased Effect, +8 Dexterity, or +4 All Attributes.
- Tier 2 targets: 25% Increased Effect, +6–7 Dexterity, or +3 All Attributes.
- Buy at least 3 clean bases. Spam Orbs of Alteration until a Tier 1 or Tier 2 target.
- Base Note: Backup bases keep the craft moving if a fracture misses.
- Profit Note: If you hit 25–35% Effect with another useful attribute like T1/T2 Intelligence or Life, price-check it. Sell if valuable; otherwise keep rolling.
- Use an Orb of Augmentation, then a Regal Orb.
- Fill open affixes with Exalted Orbs, or stop here if skipping fracture.
- Optional: At exactly 4 modifiers, use a Fracturing Orb for a 1 in 4 hit.
- If it hits, finish like a fractured base. If it misses, start over.